
Fixing Rust on Your Fiat the Right Way

When it comes to maintaining the longevity and aesthetics of your classic Fiat, addressing rust issues is paramount. Rust not only compromises the structural integrity of your car but can also detract from its overall value and appeal. Whether you’re a seasoned car enthusiast or a Fiat owner looking to preserve your investment, understanding the proper methods for rust repair is essential.
Identifying rust damage early on can save you significant time and money. Common areas prone to rust on classic cars include wheel wells, the underside, and the edges of doors and hoods. By taking a proactive approach to repair, you can prevent minor rust spots from evolving into serious issues that require extensive work.
This article will guide you through effective and straightforward techniques for removing rust from your Fiat, helping to restore its classic charm and ensuring it remains a cherished part of your automotive collection for years to come. From surface treatment to advanced restoration methods, the knowledge you gain here will empower you to tackle rust with confidence.
Assessing the Extent of Rust Damage on Your Classic Fiat

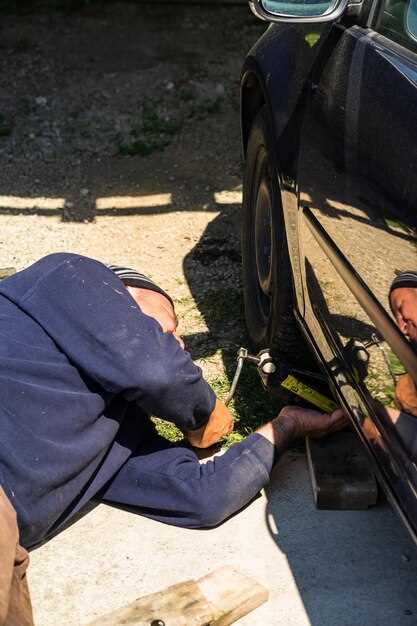
When it comes to maintaining the integrity of your classic Fiat, identifying rust damage early is crucial. Rust can spread rapidly if not addressed properly, leading to more extensive repairs. Begin by thoroughly inspecting the exterior of the car, paying special attention to areas commonly affected by rust, such as wheel arches, door sills, and the underside of the vehicle.
Use a flashlight to illuminate shaded areas and look for discoloration, bubbling paint, or visible holes. These signs often indicate underlying rust issues. It’s important to check both the interior surfaces and the trunk, as rust can develop in hidden areas where moisture accumulates.
Once surface rust is identified, perform a more detailed assessment. Use a magnet to detect any areas that may have been previously patched or filled with body filler. A non-magnetic area may suggest significant rust damage that requires professional attention. If you find rust that has penetrated through the metal, consider measuring the damage with a caliper, as this will help in understanding the repair scale needed.
Document your findings with photos and notes to help plan your repair strategy. Remember, the sooner you address rust damage on your classic Fiat, the better chance you have of preserving its value and performance. Effective assessment sets the foundation for successful restoration and ensures that your cherished car remains roadworthy for years to come.
Step-by-Step Guide to Rust Removal Techniques
Removing rust from your car is essential to maintain its appearance and protect its structural integrity. Follow these steps for effective rust removal techniques.
Step 1: Assess the Rust Damage
Start by thoroughly inspecting the affected areas of your car. Identify the extent of the rust and determine whether it is surface rust or has penetrated deeper into the metal.
Step 2: Gather Necessary Tools and Materials
Collect all required tools for the job, including sandpaper or a wire brush, rust remover solution, a clean cloth, primer, and paint that matches your car’s color. Gloves and safety glasses are also recommended for protection.
Step 3: Prepare the Work Area
Choose a well-ventilated workspace to perform the rust removal process. Ensure the area is clean and free of dust and debris to prevent contamination during repairs.
Step 4: Remove Loose Rust
Use sandpaper or a wire brush to gently scrub away any loose rust from the surface. Be cautious not to damage the surrounding paint. This step is crucial for ensuring that the rust removal solution can penetrate effectively.
Step 5: Apply Rust Remover
After removing loose rust, apply a rust remover solution to the affected area according to the manufacturer’s instructions. Allow it to sit for the recommended time to ensure maximum effectiveness.
Step 6: Clean the Surface
Once the rust remover has worked its magic, use a clean cloth to wipe the area. Ensure all residues and moisture are removed before proceeding to the next steps.
Step 7: Prime the Area
To prevent future rust formation, apply a rust-inhibiting primer to the cleaned area. This will create a protective barrier over the metal and improve paint adhesion.
Step 8: Paint the Repaired Area
Once the primer is dry, carefully apply paint that matches your car. Use multiple thin coats rather than one thick layer to achieve an even finish. Allow adequate drying time between each coat.
Step 9: Final Touches
After the final coat of paint has dried, inspect the area for any imperfections. If needed, lightly sand and apply touch-up paint for a seamless blend with the rest of your car.
Step 10: Regular Maintenance
To keep rust at bay, regularly wash your car and inspect for new rust spots. Consider applying a protective wax or sealant to enhance the paint’s longevity and defense against moisture.
Best Practices for Preventing Future Rust on Vintage Cars
Protecting your classic car from rust involves proactive measures that ensure its longevity and maintain its aesthetic appeal. Implementing these best practices will help you manage moisture and prevent rust from establishing itself.
1. Regular Washing and Waxing: Keep your vintage car clean by washing it regularly to remove dirt, salt, and grime, which can trap moisture. Apply a high-quality wax to the exterior after washing. Wax acts as a barrier against the elements, reducing rust formation.
2. Inspect and Address Areas of Concern: Frequently check undercarriage areas, wheel wells, and various body panels prone to rust. Catching early signs of corrosion allows for timely removal and repair before they escalate into larger problems.
3. Store in a Dry, Climate-Controlled Environment: When not in use, keep your classic car in a dry garage or storage unit that minimizes exposure to humidity and temperature fluctuations. Investing in dehumidifiers may also be beneficial in particularly damp areas.
4. Use Rust Inhibitors: Consider applying rust inhibitors on metal surfaces, especially those that are prone to rust. These specialized sprays or treatments can significantly reduce the likelihood of rust forming over time.
5. Ensure Proper Drainage: Check that water does not pool in any area of your vintage car. Ensure that drainage holes are clear and functioning correctly to allow moisture to escape effectively.
6. Regular Maintenance: Schedule routine check-ups and maintenance with a qualified mechanic to address potential rust issues. Keeping all components, such as gaskets and seals, in good condition helps prevent moisture from entering vulnerable areas.
7. Consider Repainting: If your car’s paint is chipped or damaged, consider repainting to protect the underlying metal. A good paint job not only enhances appearance but also serves as a first line of defense against rust.
By adhering to these best practices, you can significantly extend the life of your vintage car and preserve its value while minimizing the risk of rust damage in the future.


